Sunday, November 21, 2010

Kumquat Varieties

As of late, it has been extremely difficult to keep up with my posts. Yesterday, I officially became a docent and I didn't realize how cool it would feel after getting a name badge and certificate.  It's just paper, but it was so much fun learning about things I like to do. I was forced to take courses my whole life in crap I didn't care about so education for me, even though I am a teacher, was not fun nor has it ever been....however, I enjoyed my Spanish coursework when I was allowed to focus on it.  This was a different experience and one that I want to continue in a Master Gardening program.  Anyhow, I am working on the final part of the persimmons mystery which will be a vlog, the descanso roses after my hard cut, diagram drawings on using the bubble technique, plant identifications, and some historical information on ethnobotany here in the desert southwest. There is a lot of info that is just sitting here waiting for me to decipher and dissect. However there just isn't any time to write!!  Today I am going to write about an easier topic.....kumquat varieties here in Tucson.  Kumquat are one of my most favorite fruits and it makes me so happy that we can grow these wonderful small tree/bushes here in the desert.  Here's the skinny on how to grow this wonderful citrus. 

Fukushu Kumquat

In Phoenix, these plants do well as long as they are protected from direct direct sun....meaning they get afternoon shade.  In Tucson, the sun is fine, but the frosty nights we have in the winter are deadly.  I have two varieties growing on the property.....fukushu and nagami.  Most locals recommend putting them in pots as I have done so as well.  They make an attractive small tree in pots.  I have planted one in the ground just to see what it will do....so far it looks great and there has been growth on it.  The best part about shopping for kumquats is sampling the fruit on the trees.  One of them accidentally exploded on my shirt and I was given away as being that "guy" eating his way through the nursery.  Hey, I had to make sure I got the best ones!!  They can be expensive.  I'll go into the differences in just a moment.


The Fukushu Kumquat.  It performs well in all citrus regions.  It is extremely cold hardy(that's one reason I purchased this variety) and perfect for areas too cold for most citrus.  It is the first kumquat variety to ripen and bears an abundance of fruit mid-November through March. The small round fruit is larger than other kumquat varieties and has a thin soft rind that is sweet and edible to eat.  Kumquats are great because you can just pop the whole thing in your mouth.  This variety has a rounded-leaf shape and a vigorous compact growth habit.  It's listed as an ornamental plant for the landscape and recommended for container gardening.  The fruit is recommended for eating straight off the tree and/or used for sauces, candies, and marmalades.  The fruit is delicious and that's all I am going to say. 

The Fukushu Kumquat

The Nagami Kumquat.  The Nagami Kumquat is oval in shape, 3/4" to 1" in diameter and between 1" to 2"long. The tartness of the fruit makes them great for use in cooking and/or for marmalades and jellies.
The tree is shrub like and is similar to an orange tree in appearance. It is a prolific bearer and very decorative because of the dark green leaves and brilliant orange fruit. The fruit lasts for several months on the tree in warm winter climates.
The Nagami Kumquat


The trees do very well when planted in the yard or in larger pots. They can withstand temperatures as low as 28 degrees and require about the same care as other citrus.  The kumquat tree is highly resistant and possibly immune to citrus canker.  Until next time, happy gardening and Thanksgiving!! Kumquat is a wonderful addition to container gardening!


Sunday, November 14, 2010

Replacement

The wonderful part about blogging is that there is always something going on in the garden.  There are so many things to learn about as I am designing and reconstructing our property.  And of course, they should have a class on how to blog.  When I first started this journey earlier this year, I hadn't a clue on how to set up a posting.  Since then, I purchased a top notch camera, break down the posts into one central idea, and bring my equipment with me wherever I go.  In fact, I think we all have so many ideas that go through our heads that when we walk outside into our own gardens, we sometimes forget that there is a lot going on.....and I'm proof of that. On my blogging options, I'll create a list of topics for me to write about and then when I get to it, I'll post.  Sometimes I'll have a bunch of them done and release one a day or sometimes, when I'm busy, I'll go back and look at my list to see what it is that I am needing to report.


We easily get sidetracked and forget what our "mission" was for the day.  For example, today I am adding more bark mulch around an area, checking a water line, planting a guava, and adding more soil in a pot to my fatsia plant.  That doesn't sound like much until you weigh in how much time it takes to dig a hole in our desert soil.....caliche sucks. So to prep that hole digging experience... you need water and a strong metal rod to stab into the soil. Loosen. Take shovel and dig. Repeat the first steps over again until hole is established.  For people living in the desert southwest, you do need to know this.....caliche is great soil and once you have your plant in that section and water over it, the caliche will break down and disappear from that area.  I don't think a lot of people know that....but with repeated watering that stone layer in our soil will disappear.

The Crape Myrtle on the right is the one in question...behind the nandina or heavenly bamboo.
So the last post was about editing, this post is about replacement.  As the garden is getting bigger and the oak trees are extending their canopy further over the courtyard, several sun loving plants are now not doing so well. Several homeowners have suggested that I get rid of this crepe myrtle as it is not getting enough of our sun.  But here's the problem....there is another crepe myrtle on the opposite side of this particular garden growing quite well.  To remove one would also take away the balance that they both have mirroring each other....so you can see my issue.  There is no doubt in my mind that this plant must be taken out of the garden....it looks terrible.  Those of you familiar with crepe murder(posted on an earlier blog titled "crape murder") will understand the pictures better once you see them.  They were butchered and on top of that get nothing but shade so they look spindly and ugly. Part of me thinks I should just cut them to the ground and let them grow again and another part thinks that there is a better plant to put in that spot.  I am at a crossroads with this issue.  I was able to ignore it for a long time as other parts of the garden distracted me from dealing with it, but now my focus is on that section of the gardens.  The garden that is opposite of it is shown below.  As you can see, one is lush while the other is sparse and one side looks "heavier" than the other.  Editing and replacement.....both difficult, but I do know that something must be done.  Recommendations?  You guys give lots of great advice.  Thanks:)
Opposite Side

Friday, November 12, 2010

What's a rain chain?

In class the other day, someone brought up some different ideas for collecting rain water.  The word "rain chain" came up and I didn't know what they were talking about so here is what I've found....Pics are not my own on this post and are taken from the rain chains website.

"Rain Chains are a beautiful and functional alternative to traditional closed metal or plastic downspouts. They break the fall of the water, guiding it visibly downward to the ground, into a basin or even a rain barrel for storage. Rain chains sound great!"  http://www.rainchains.com/


Basically they make sound as the water flows down them.  They are kind of like the windchimes of rain:)
I'm trying to figure out where I could put one of these guys down the road.   It's a pretty cool concept and one that is worth the try. Happy gardening!

Thursday, November 11, 2010

Editing Plants From Your Garden

Morning Glory twining amongst the Ficus
One of the most difficult things to do in the garden is removing a healthy and happy plant.  Last week during one of our gardening meets, I chatted with a fellow gardener who had mentioned that she had to remove several very healthy plants to open more space for her other plants.  We also spoke of the survival rate of plants we put into our ground here in Tucson.  Both of us came to the conclusion that about half to 75 percents of the plants survived while with some species, the survival rate was under fifty percent.  Those percentages equate to money lost and invested into our landscapes so one can only imagine how difficult it is to take out an older or extremely healthy plant from our garden.
The example I will share today is about our little Christmas tree that I put into the ground in 2008.  When I began taking over the grounds, I didn't have a lot of money to invest into plants so if people offered me a plant, I would take it and try it out.  A neighbor gave me her living Christmas tree and I thought....what the heck, let's try it.  Not only did it grow but it was very drought resistant.  I tried everything in my power to let it die on its' own.....and it wouldn't.  I then took the stance that the tree earned the right to keep that spot, but as the garden started forming in its' shape and size, the pine tree didn't fit at all with everything around it.  It stuck out like a sore thumb.  It was competing with a mulberry and fig tree which both were of healthy sizes.  If all three grew super large in the future, there would be conflict for space and root rights.  Today I had to make that tough decision and edit for the second time this year. If I pull a plant from the garden, I pot it and put it in my "nursery" until it recovers, but this pine was too large to pot.  It no longer is alive.
                                                          
I have deduced that this "editing" is common practice for gardeners through our discussions together. If you felt sad just reading that part, join the party.  It's not easy to let a plant go....especially when it has been around for awhile. However, it is necessary to do....perhaps a "necessary" evil to keep the balance proper on your own grounds.   As things grow, we don't always know what form they will take....we can imagine what they will look like, but they don't always work out that way:) Purchasing plants is expensive and when they die, we figure...darn, but let's try the plant in this spot.  But when a plant is thriving and doing well, why on Earth would you touch it? And that question doesn't have a right or wrong answer so please share what you would do in your own garden space:)

Monday, November 8, 2010

The Finale of the Parade Part 2


The finale to the parade was spectacular. What you will see in this video is the burning of letters and poetry from the living for family and friends who have passed away.  The spirits descend to reconnect with the living world for a brief moment and during this time, both living and dead are reunited.

Day of the Dead Parade 2010 Part 1


Here are some highlights from last night's event. Part one shows the parade and part 2 covers the end of the parade.....you won't want to miss this! I love the new window's movie maker....fun stuff.

Sunday, November 7, 2010

El Día De Los Muertos


An incredible day to celebrate, Day of the Dead is one of the most beloved holidays in Guatemala, Mexico, and the Southern US.  It  is celebrated in other countries, but it originated from the state of Michoacan, Mexico.  Specifically, it is celebrated on an island called Janitzio in the middle of a lake....I like to call it the Dead Lake.  It's a burial ground and the native americans of the time, the Purepechas, believed that this place was a gateway to heaven. This post has taken about 3 weeks to put together so I hope you enjoy all the fun.

2009

You may have noticed that I haven't been writing as much as of late due to my job.  I'm a Spanish teacher and during this time of year, things get crazy with this busy holiday.....Day of the Dead.  It's a wonderful time of year when people get together and remember all the ones who have passed in our lives.  Tucson is a wonderful place to live for so many reasons.  As you may or may not know, we have a large hispanic population here and I believe it makes up over half the people here in Pima county.  A lot of Mexican traditions have stayed in the city and have been passed onto others.
Taken in Tlaxcala, Mexico

Notice marigolds


It is traditional on November 2nd and 3rd to go to the cemetary and dress up the tombs with an altar full of flowers.  The marigold is the official flower of the dead.....and one of my favorites from back home:)  In fact, one of my students brought in a live marigold for their altar in class and they were going to leave it there without water.  It's now on my desk about to bloom:).  I want to repeat how special this day is for thousands of people and I will take you step by step showing you the various things you will see around Tucson and in Mexico. On the altar, the deceased person's favorite food and drink is offered so that the spirit may partake in the dinner with the living.
Color!!

Sugar skulls or calaveras are made to put on the altar with the deceased person's name on it.  Some kids eat them and they are fun to make with your own children.  All you need....merengue powder, sugar, a mold, and a touch of water.  Frosting is also used....add dye and merengue for color in either the sugar or frosting.
Taken in Rocky Point, Sonora, Mexico

Paper Mache!!!  What a mess!  But oh so fun:)
Calacas, or skeletons are made in a happy or light mood to celebrate death and not mourn it.  My kids put together several paper mache calacas and have them displayed in our library.

Pan de muertos...or dead bread, comes in a variety of shapes, sizes, and flavors.  Generally it is dry with anise in it....good with coffee or for breakfast.  High school kids don't like the flavor so much so I get the sweeter  stuff with very little anise from our local bakery, La Estrella.  Not a crumb is left after the end of each period. PS.  If you are a mother or creative soul, leftover dead bread makes great French toast.  Just saying:)


Our parade.  Every year Tucson, puts on a show that attracts thousands of people to the parade.  It starts at 6 PM and goes until about 8 or 9 PM....and later if you are older:) Again this is a time of celebration as people bring pictures of their loved ones and celebrate their lives.  It is tradition to write their name and a poem dedicated to them on a sheet of paper.  At the very end of the parade, the paper is offered to the heavens and burned at the altar.  People are laughing and dancing and just living life.  During this time, I remember my grandparents who have passed and all those who have lost their lives in the war.  Recently, one of my students just found out her father was killed 2 nights ago in Afghanistan.  Another two friends of mine lost their mothers just recently and I have to say that it has been a year of loss for so many people.  And so people go to this parade to celebrate their life..... they go out and eat dinner in honor of their loved ones....usually at their favorite restaurant or at their graves.   They carry pictures to remember them during their walk.   Their legacy lives within you and for one night, you can reconnect with them along with thousands of other people as you celebrate, dance, sing, eat, and dress up for this very important celebration. Never forget those who have made an impact on your own life.


Saturday, November 6, 2010

The Bamboo Ranch

Part 1 of a 2 Part Series on Bamboo

What would your garden look like if you just planted bamboo? Ever wonder the space it would create?  I asked myself this question last year as I began planting bamboo around the gardens.  I did a lot of research on bamboo and made the decision to plant Buddha's Belly Bamboo. It was a beautiful variety and today it grows and makes a bold statement in the garden.  I had heard of a home that fell in love with bamboo and were so passionate about this plant that they started growing it. People saw their garden and began asking where they could buy bamboo. And so began Tucson's very own Bamboo Ranch....  This place did not disappoint in the least. Their home is surrounded by a shroud of bamboo forest.  It had so many varieties of bamboo growing all over the property that it was hard to distinguish one from the other. However, the owners have everything you need to know about bamboo and will walk with you around their property to point things out.                         

Bring a list of questions before you go as the owners will go over a lot of information with you.  We were given a pad and paper to write down varieties of bamboo that we may be interested in purchasing.  Bamboo, by the way, is bigger than you can imagine.  There are smaller varieties, but even then, they are still pretty big.  In the picture above, you will see the difference between the running and clumping varieties. The left, the running bamboo, is more hollow while the right, or clumping variety, has a thicker culm.  The runners are great for areas that you don't care about or an area you want filled fast.  It can be invasive and most people think ALL bamboo is like this.  However, it is not.  I believe the majority of people in Tucson prefer the clumping varieties over the runners.  It was explained that because of our clay soil; it's not really all that invasive....but be warned:)

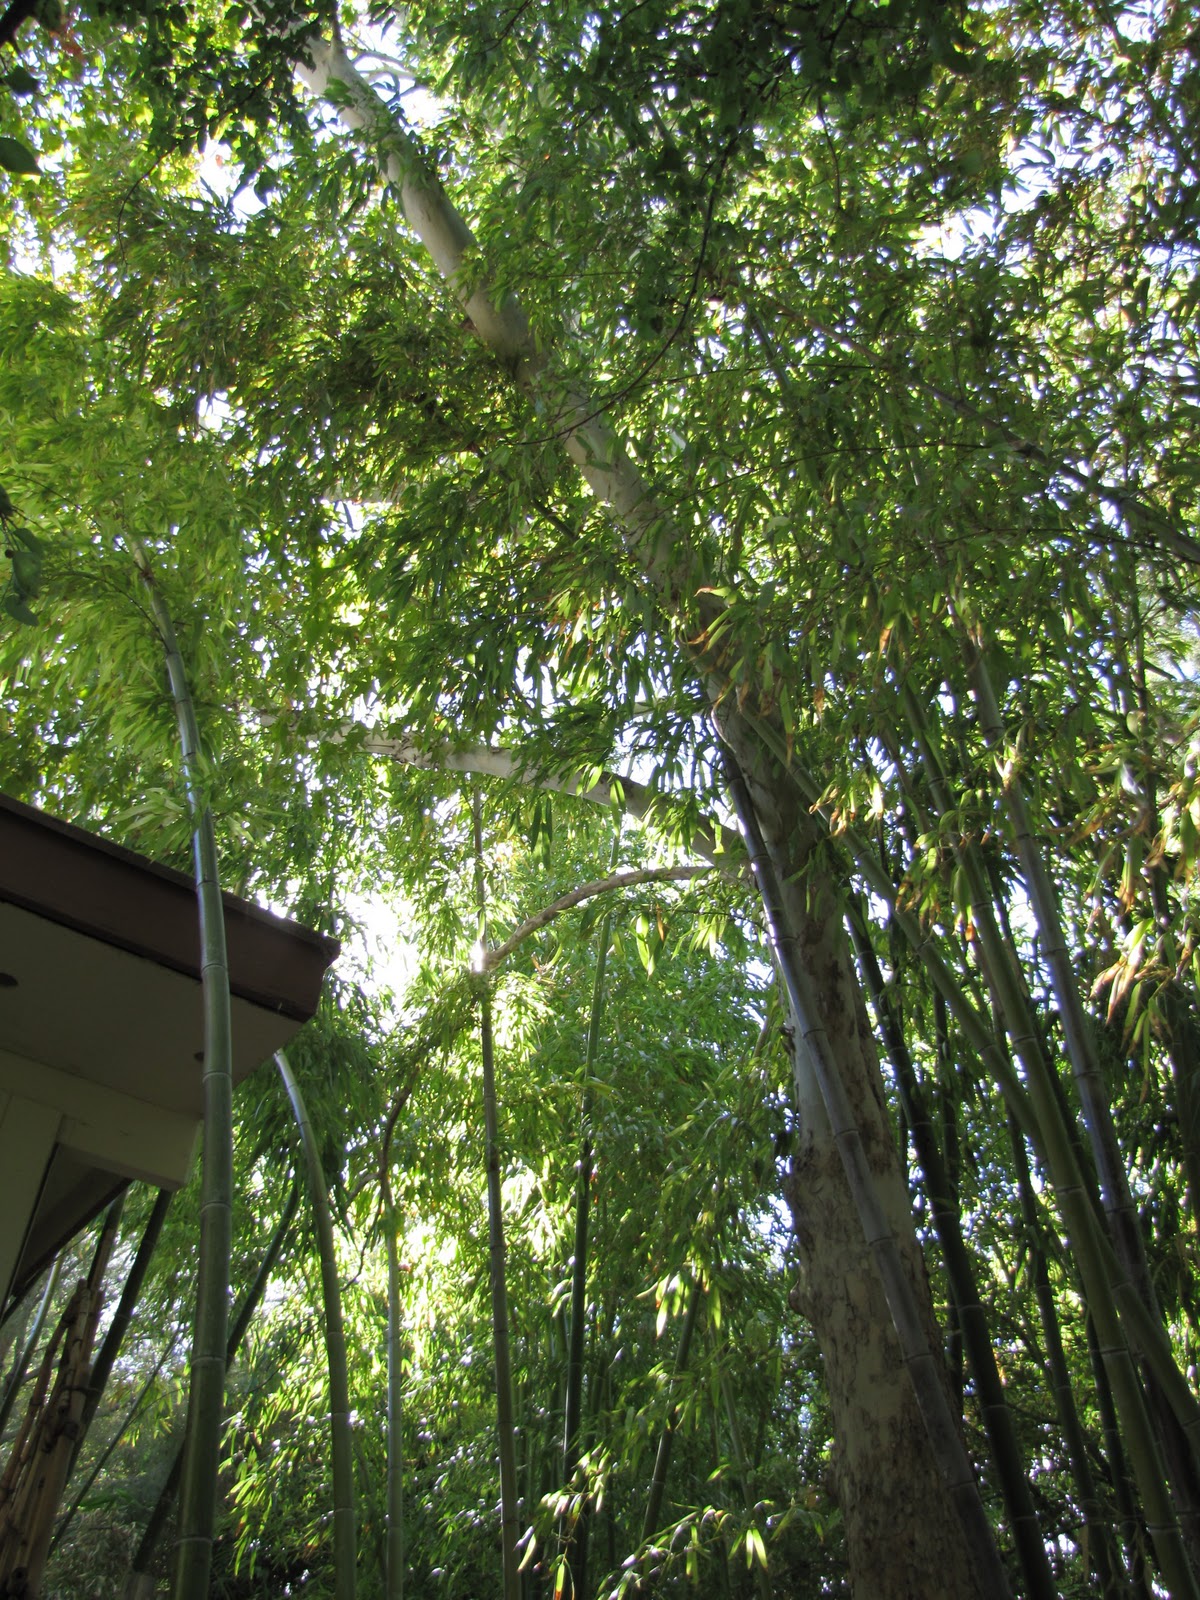
 Ever wonder what it would look like if you planted your garden with only bamboo?  Look here as the sun is blocked by this forest of green sticks.  I will say that bamboo encourages mosquitos to hang out longer in the fall.  If you plant bamboo, make sure you have the space.  It makes a great screen from the neighbors and during the summer it does require a little extra water.  However, if you have grey water, direct it to your patch of bamboo and see what a difference it will make:)

Tucson Botanical Gardens

Bamboo will rise to the occassion above your trees. It loves sun and I find it does better on the west side of our home. In shade, it will grow slowly.  The first year, your bamboo won't do much, but in your second year, you'll see it double in size. By the 3rd to 5th years, you will notice thicker culms.  It is considered a grass and should be fed twice a year with nitrogen.


A bridge over a wash creates a magical space. Your garden space can be transformed into a tropical wonderland.  People say that bamboo is not native to Tucson and they wouldn't be completely wrong except that there is a bamboo native to the Sonoran desert known as the Mexican Weeping Bamboo.


Bamboo galore!!  Generally a 5 gallon runs 40 bucks at Home Depot or Lowes. However, at the Bamboo Ranch, you'll find a large variety of bamboos that vary in prices according to the variety you buy.  Generally, for a healthy batch of bamboo in the 5 gallon, it'll run you anywhere between 50-65 dollars while the 15 gallon pots will run you around 120 dollars.  Now that I know this place is here, I'll be returning for more in spring:)


Check out the culms on these stalks!!  Notice how some bamboo are more erect while others bow.....something to consider.


You can have your own forest within 5 years:)  Just beware....once it's in the ground and established, it can be difficult to get rid of......


Notice the size against human comparisons.....


Netting is only needed on the very hot side of the home when they are getting established their first year.  Once established they can take the FULL sun. 


For more information on purchasing bamboo, contact 520-743-9879 or email at bambooranch@juno.com
If you are interested in visiting the Bamboo Ranch, you will need to set an appointment up with the owners.  It truly is an amazing place with over 100 varieties of bamboo. As they say in their advertisement, it's your southwest source for bamboo!! You can see that they love what they do....it truly was a great afternoon at "The Ranch"  Below are two websites.  One is for the bamboo ranch and the other was a link that shows you how tall bamboo can get.  Happy Gardening!!


Thursday, November 4, 2010

Wildflowers

My friend Kristen near Kitt's Peak

I have to admit that this post does not excite me like it should.  I don't know why, but I guess I'll explain as I go.  I should first admit that I LOVE California poppies and Globe Mallow and I LOVE the desert blooming in the springtime.  I've been here long enough to have witnessed two amazing blooms in our Sonoran desert. Wildflowers are a wonderful attraction in any garden, but my issue is that they are high maintenance once you get them going....oh yeah, and they like to pop up all over the place whether you like it or not.

I yelled at her to get on the ground but she wouldn't at first because she thought a rattlesnake may have been hiding.  Ahhh Kristen:)

So you may ask, "Why are you writing this blog about wildflowers then?"  I just had a class on them this past weekend and I have to admit that I wasn't looking forward to the discussion.  Our speaker was a wonderful person who loves these varied plants and was definitely passionate about her topic.  But like my neighbor said to me at the table, "These plants look like weeds and what I pull out of my garden!"  I started laughing because I have killed many a wildflower.....and I know that I'm doing it.  They are pesky and weedy and get into everything.  The flower is pretty, but afterwards, it makes the garden look unkept.  I know I know.....who do you think you are mister?  Wildflowers are the bomb, phat, tight, cool, or fill in the blank with the latest word for "awesome"___________!  Okay okay...don't shoot me down....I love all plants great and small, but I like them in their natural setting.  "But they are in their natural setting!"  Yes yes....I know this....just not in my garden please:)
Taken in '97 near Kitt's Peak. In masses, wildflowers are sexy.

Here are some tips if you are into wildflowers....and they are pretty when in bloom.  The seeds are generally smaller so put them in a ziploc bag with some sand and mix them up.  Rake up an area loosely and sprinkle the seeds into the ground.  Cover with a light amount of dirt and water gently. Note. Some gardeners leave extra seed out for their feathered friends as they like to check out your work once you're done.  In the desert, it is important to plant your seeds in September or October so that they will germinate. Most need full sun. Not to be a party pooper, I purchased some desert zinnias and am planting them on the south side of the home.  We'll see what sprouts. Here's the 411 of wildflower perfection in the Spring....
-You need moisture to germinate seeds.  Some recommend a deep soaking of the seeds to wash off the "inhibitor".
-Plant between September and early December for germination to get that fabulous wildflower show that makes the Sonoran desert dance
-1 inch of moisture is required along with heat and fall rains.  If fall rains are sparse, as they have been this "La Niña" year, water area.

If you are heading to Rocky Point, as I am seen here, you will pass some key areas of the Sonoran desert that are famous for their wildflower shows of mallow, lupine, datura....well, the list goes on and on. It is not uncommon for people to stop along the roads and snap pictures as I did on our way down to Mexico from Tucson. Best time for Mother Nature's show is from April to May.

Did you know?
In the Sonoran desert, 5,000-10,000 seeds are found per square meter according to studies done by the UA.

Wednesday, November 3, 2010

The Principles of Xeriscaping

Swallowtail in my garden
I have to admit that when I first moved to the desert and heard the word "Xeriscape", I didn't want anything to do with it.  To me, at the time, I thought it meant zero plants and more rock.  The fact of the matter is that xeriscaping can be lush and beautiful.  With the way the world is changing, it is only a matter of time before resources begin to run out.  Currently most people pay for the delivery of water but not for the quantity of water.  Some people believe that this "extra charge" is coming sooner than later.  In fact, it does happen in some countries right now.  Living on the desert island of Sal in Cape Verde, we had a very limited amount of water and it was delivered once a week. I learned quickly to be ready to fill our tank up when the trucks came. They charged for delivery and the amount used.  As the world's population increases so will the use of her natural resources.  Many of us reading this will not see the affects of this, but unfortuneatly our grandchildren will and that is a sad thought.  So to be a forward thinker, xeriscaping is not zeroscaping as it's about planting vegetation that will grow within the amount of your rainfall each year.  Xeriscaping is not just for the desert regions but for all places.....it's wise planting for your water bill.....and low maintenance in your garden. In the next two segments of this blog, I'll cover the principles of xeriscaping and the 3 basic regions of gardens using the xeriscape model around your home.  It's sound advice financially and naturally as wildlife, native to our areas, will respond to local plants that will thrive in our own yards.  

Ground Morning Glory

The Zones.  When using the xeriscape method, you must think of setting up your zones.  There is the oasis zone, transition zone, and native zone.  The oasis zone is near your home and placed around your seating areas, patio, etc.  This zone tends to get more water and attention.  Think of this area as your "oasis" when you sit down with guests or for that cup of coffee.  Larger pots are placed around this area as it is easier to water them being closer to the house.  The transition zone consists of native trees that you'd like to shade your home.  If you have gray water, this is a good place to irrigate.  Trees should be placed 15 feet from your home to provide shade and coolness from our desert sun.  It will also create a pleasing aesthetic look.  The plants will need occassional watering to keep them looking attractive.  Finally, the natural or native zone is the lowest and furthest away from the home.  These use the lowest water amounts and are generally native plants. Once established, these plants should need little to no water depending on our annual rainfall.  Remember to group plants with similar needs for water, sun, and maintenance to increase irrigation efficiency and reduce maintenance time.


Here are the 7 principles of xeriscaping......
1. Water-wise planning and design
2. Soil Amendment or not..
3. Plant Selection
4. Limited Practical Turf...if any...but we need to consider people who have kids
5. Efficient Irrigation
6. Mulch
7. Proper Maintenance


Until next time, happy gardening!!!